Build a Homemade Gravity Bong
How to Build a Gravity Bong
Colloquially known as a “GB”, “gravity pipe,” “grav bong,” “jib,” or “geeb,” a gravity bong was once one of the most cost-effective ways to be a hardcore stoner—especially for legacy era consumers who couldn’t enjoy the easy access and availability of today’s market.
The appeal of a homemade gravity bong is a no-brainer; they’re easy to craft, really fun to use, and you probably already have the tools you need to make one at home. But, we know what you’re probably thinking. Why would I want to create a makeshift bong when I can easily pick one up at the dispensary down the street?
While hunting for creative ways to consume cannabis is more novelty than necessary for modern consumers, we can all still benefit from knowing how to craft a grav bong. If nothing else, you’ll have a great new party trick up your sleeve—or a handy use for those water bottles you’ve been meaning to recycle.
What is a gravity bong?
Seasoned stoners already know about the timeless classicism of the gravity bong.
It’s perfect for closing the gap between having weed but not having anything to consume it with, or just a fun new smoking experience to try out if you feel like mixing things up. As we mentioned, you likely already have the necessary tools lying around your house. You just need to know how to put them together.
How does it work?
Although simple to pull together, this homemade consumption method is as scientific as it is elegant; as well-thought-out as it is chaotic and carefree.
Gravity bongs work by using air pressure and water to draw smoke out of a device, sort of how a hookah or regular bong works. They were by submerging a small bottle with a bowl of cannabis with a larger bottle or bucket of water, lighting the weed, and forcing that heavily-concentrated smoke into your lungs.
An old-school stoner favorite, geebs are definitely not for the faint of heart—and probably not a great idea for a first-time consumer. The heavy concentration of smoke means your lungs will be filled to the max, way beyond what the average glass-pipe hit is capable of. You’re essentially breathing in the smoke of an entire bowl in one go, so if that’s not something you feel prepared for, you might want to hold off on building a grav bong until you’re more experienced and confident in your consumption habits.
That being said, size definitely matters in the world of gravity bongs. The bigger the bottle, the more massive your hit will be. You might purposely opt for as big a vessel as possible. Think: gallon jugs. Alternatively, you can start out with a mini bottle to test the bong waters out with, especially if you’ve never hit a geeb before and feel more comfortable taking things slow.
How to make a gravity bong
Ready to learn how to make a geeb of your own?
While building your own grav bong was necessary throughout the past few decades, today’s market offers quite a few legal options you can purchase from trusted brands, like Stündenglass or Gleeb. However, making your own is cheaper, creatively fulfilling, and won’t take longer than 10 minutes of your time.
Here’s how you do it.
Tools
- An empty large plastic bottle (remember: size matters, so keep in mind that the size of your bottle of choice will directly correlate to how phat your hits will be. 16-20 ounces is pretty standard.)
- Keep in mind that inhaling cannabis from a hot plastic material is…somewhat sketchy. To avoid the possibility of inhaling chemicals, some people opt for glass materials instead of plastic.
- A bucket or similar container filled with water (this has to be larger than your bottle of choice)
- Drill (or some other poking device you can create small, precise holes with)
- Scissors or a box cutter
- Bong downstem and bowl piece (or, in a bind, a piece of aluminum foil)
- Cannabis flower of your choice (for testing the final product, of course!)
Steps
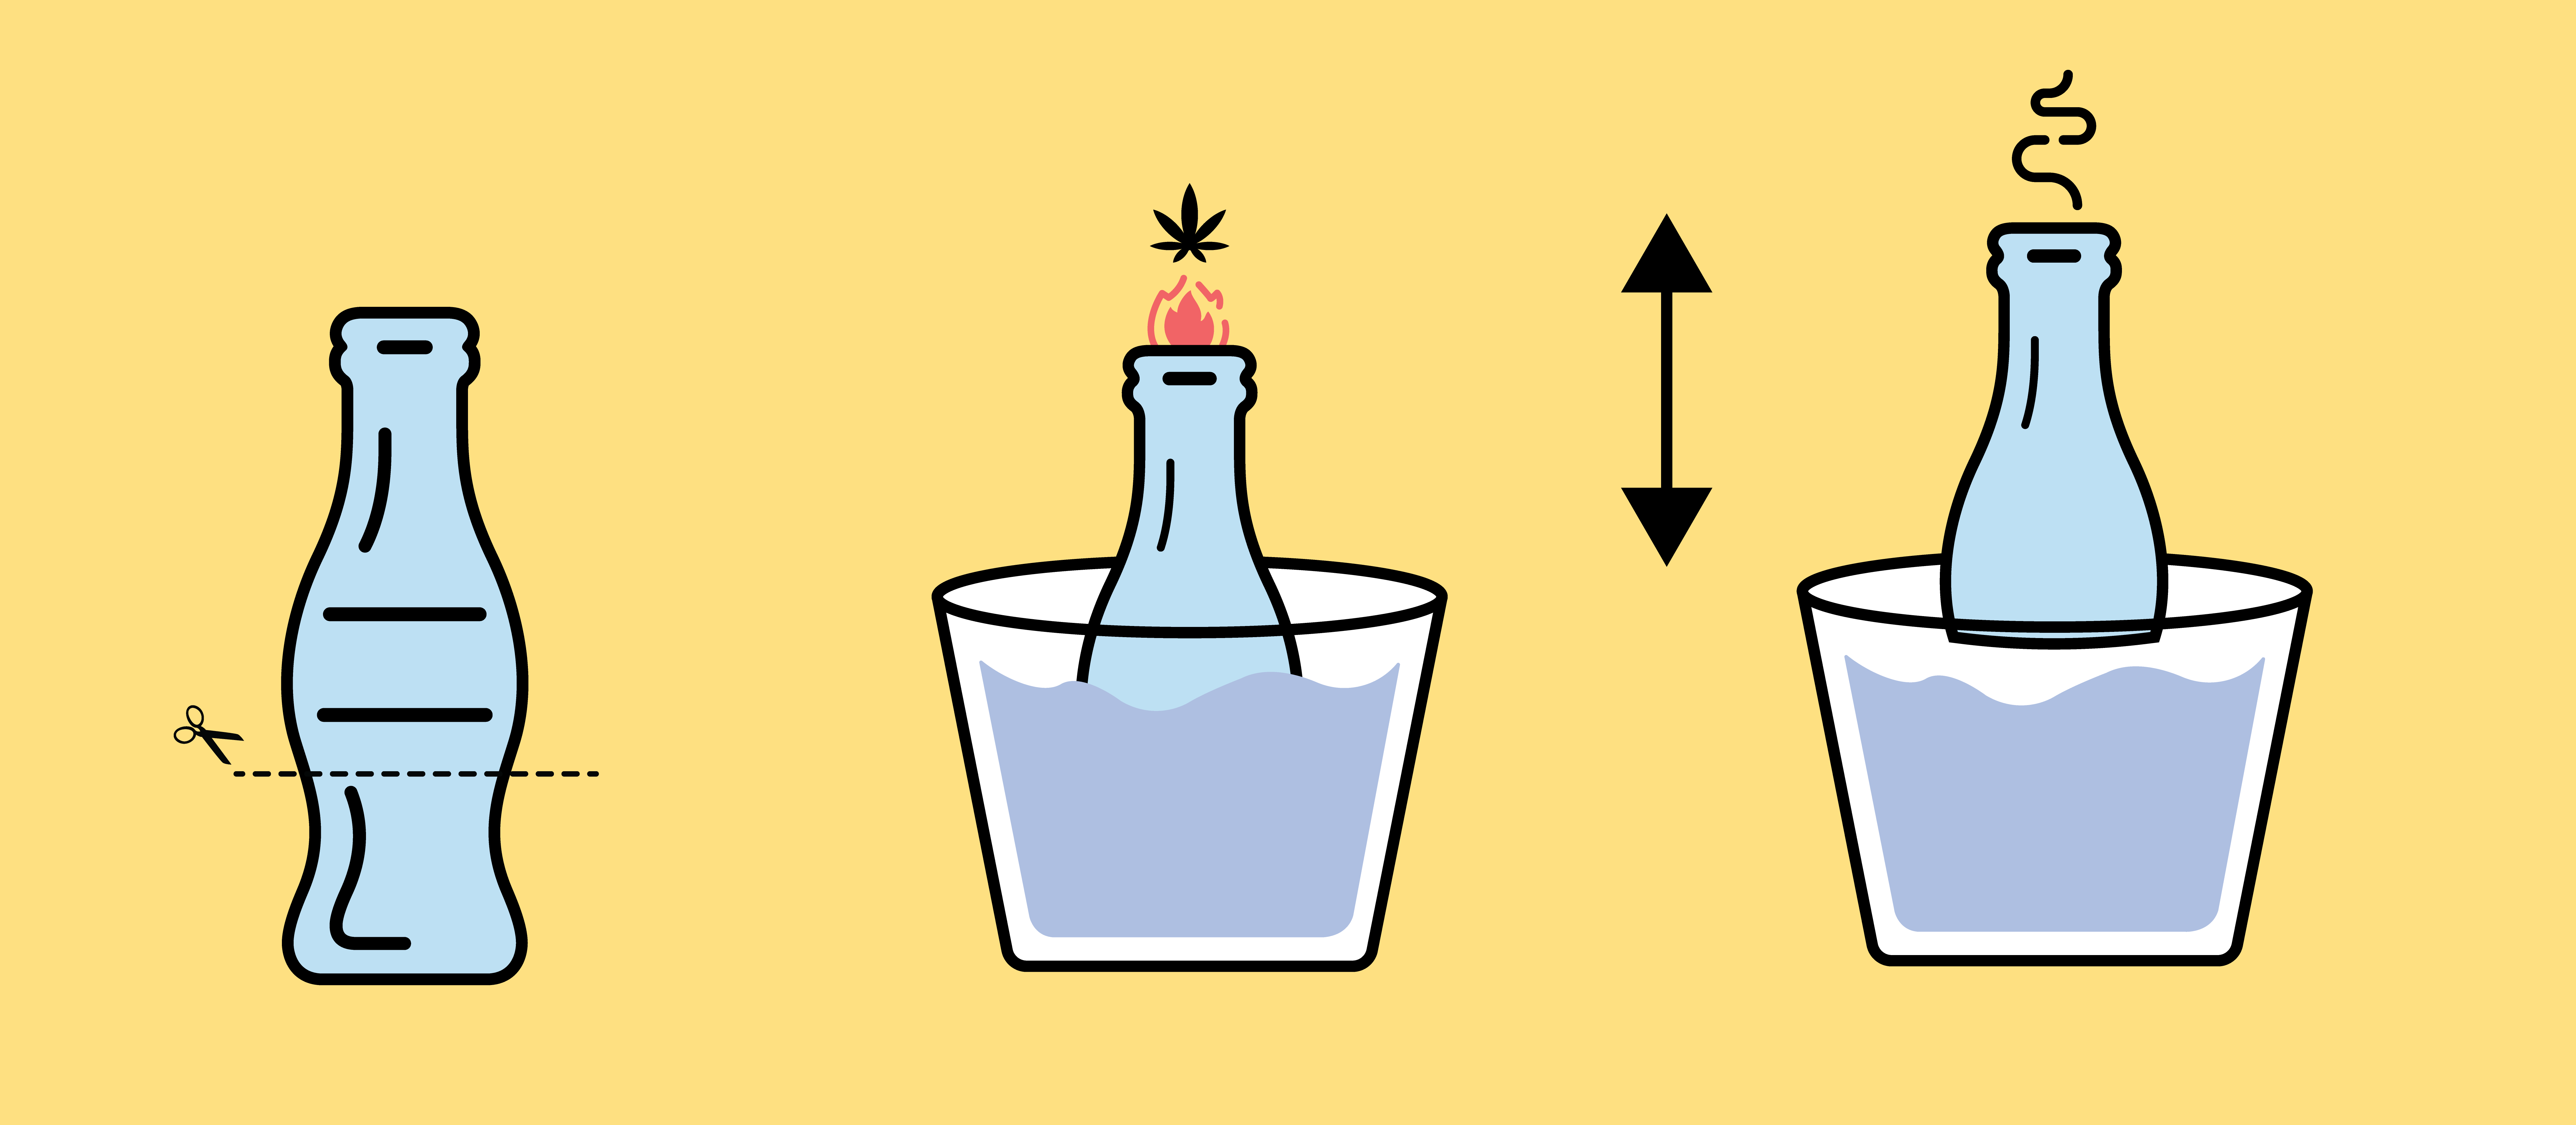
- Cut a hole in the bottle or container—the smaller one, that is. One notable issue with opting for glass over plastic is you can’t exactly slice into glass with a pair of scissors, so if you don’t have the tools you need to create an opening in your glass container, we don’t recommend going that route. But for cuttable containers, take your scissors or box cutter and remove the entire bottom of the bottle.
- Once you have a hole in the bottom of your bottle, drill a hole into the lid of your bottle—big enough for your downstem to fit, but snug enough that it doesn’t fall through entirely. Then, just place your bowl into the stem, just like you would for a bong hit. When it comes to best practices for how to make a grav top, remember that if you don’t have a bowl and downstem to work with, you can substitute these tools with aluminum foil. Simply grab a small, square piece of foil, fold it in half, and place it over the top of your empty bottle. Press down gently to create a slight depression; then, use a toothpick or paperclip to poke several tiny holes in the foil.
- Next, it’s time to fill your bigger vessel with water. Only fill it about ½-¾ full, otherwise the water will spill over (and on you) when it’s time to use the bong.
How to consume using a gravity bong
There you have it—three simple steps, and you’ve just made your very own geeb. Now, time for the real fun: putting that thang to use!
- Once your bong is full of water and ready to go, pack that bowl just like you would any. Then, hold onto your smaller bottle, which should be gently chilling out in the larger vessel, and slowly push it down into the water.
- With the bottle fully submerged, it’s time to spark up that bowl! As the weed begins to smoke, carefully begin lifting the bottle up out of the water. This pressure creates a vacuum, which allows that smoke to move from the bowl and into that nice big bottle—assuming you opted for a heavier hit.
- Pay close attention to this next step, because doing it wrong could be perilous for your efforts. Lift your bottle out of the water enough so that it is filled with smoke. But do NOT, I repeat, do NOT remove it all the way. You’ll lose your smoke, and your tremendous renegade efforts will be instantly rendered moot.
- Once you’ve successfully pulled your bottle up without losing any smoke, it’s time to jam. Remove the bowl and downstem (or foil) from the lid, replacing it with your mouth. Gently push the bottle back down into the water, which will push the smoke out of the bottle and straight into your lungs, leaving you to sort out one of the most intense highs you’ll ever experience. Of course, you don’t have to inhale the smoke all at once; if you’d prefer to take smaller hits at a time, just keep the bottle submerged at your stopping point and recap it with the bowl and downstem to trap the smoke.


