


How to Harvest Marijuana: Tools & Step-by-Step Guide
Harvesting marijuana is a critical phase in the cultivation process, ensuring that all your hard work pays off with a high-quality yield. Understanding the step-by-step process and the essential equipment required can make the difference between a successful harvest and a disappointing one. This guide is tailored to help you navigate the harvesting process with ease and confidence.
Understanding the Harvesting Process
Harvesting is more than just cutting down your plants. This is the culmination of months of work and, if not done properly, can completely ruin your product. Timing is everything, as harvesting at the right moment ensures the best potency and flavor.
Our main goals are to maintain the plants’ essence, by preserving its cannabinoids and flavors while preventing mold and degradation. We achieve these goals by harvesting at the right time in the right space.
Timing
Finding the perfect time for harvesting cannabis is incredibly important. Harvest too early, and you may end up with buds that are less potent and flavorful. Harvest too late, and the THC in your plants can degrade into CBN, leading to a more sedative effect, which might not be desirable. To determine the perfect time for harvest, you need to closely monitor the trichomes, the tiny resin glands on your buds.
Use a magnifying glass, jeweler’s loupe, or handheld microscope to inspect the trichomes. When they are clear, the buds are not ready yet. When they turn milky white, this indicates peak THC levels.

Example of cannabis trichomes photographed under 5x magnification.
A few amber trichomes indicate that the THC is starting to degrade. Most growers aim to harvest cannabis when about 20-30% of the trichomes have turned amber for a balanced effect.
Goals of Harvesting
The primary goals of harvesting are to preserve the potency, flavor, and overall quality of your marijuana. This involves careful handling and processing to avoid damaging the delicate trichomes containing the plant’s cannabinoids and terpenes. Proper harvesting techniques also help prevent mold and other contaminants from spoiling your yield.
Harvesting in the Right Space
Cutting your plants down and hanging them up to dry sounds simple, right? However, ensuring they dry in the right environment is the key to achieving those harvesting goals. Your drying space should be clean and dark with the ability to control the temperature and humidity.
Many growers hang their plants up in grow tents due to the ability to have precise environmental control. If you use your grow tent, make sure it has been thoroughly cleaned out before drying. You can also dry cannabis in a spare bedroom, shed, or closet, provided it is cool and has relatively low humidity.
Hanging Your Plants
Some growers prefer to hang their entire plants upside down, while others process the plant into small branches (10”-16” in length) with minimal fan leaves. Fan leaves, also known as water leaves, are large leaves that are not covered in sticky trichomes.
By removing these leaves before or during harvest, you can reduce your drying time by removing water within the leaves and improve the quality of the trim once the plant has dried and been processed. Since they are not covered in trichomes, they do not add cannabinoids or resin to your trim and can degrade the quality of products made from trim, like concentrate, edibles, or salves.

Essential Equipment for Harvesting Marijuana
Before you get started harvesting, you will need a few things. Knowing how to harvest marijuana plants efficiently requires the right tools. Here’s a list of essential equipment:
- Pruning Shears – are necessary for cutting down the main stalks of your marijuana plants. Look for sharp, durable shears that can easily handle thick stems without crushing them. Clean and sanitize your pruning shears before use to prevent contamination.
- Trimming Scissors – are used for the delicate task of manicuring the buds and removing fan leaves. Fine-pointed scissors allow for precision trimming, enabling you to remove leaves and other unwanted material without damaging the buds. It’s essential to keep your scissors clean and sharp for efficient trimming.
- Gloves – Wearing gloves is crucial during the harvesting process. They protect your hands from sticky resin and reduce the risk of contaminating your buds. Nitrile gloves are preferred over latex gloves as they are less likely to cause allergic reactions and do not react with the plant’s oils.
- Drying Racks – are essential for properly drying your harvested marijuana. They provide ample space for your buds to dry evenly without clumping together. Look for racks with multiple tiers and good ventilation to promote air circulation. You can use a plastic trellis hung from the ceiling for a cheap DIY drying rack or a clothing rolling rack with metal hangers. Some grow tent companies even make racks that attach to the grow tent.
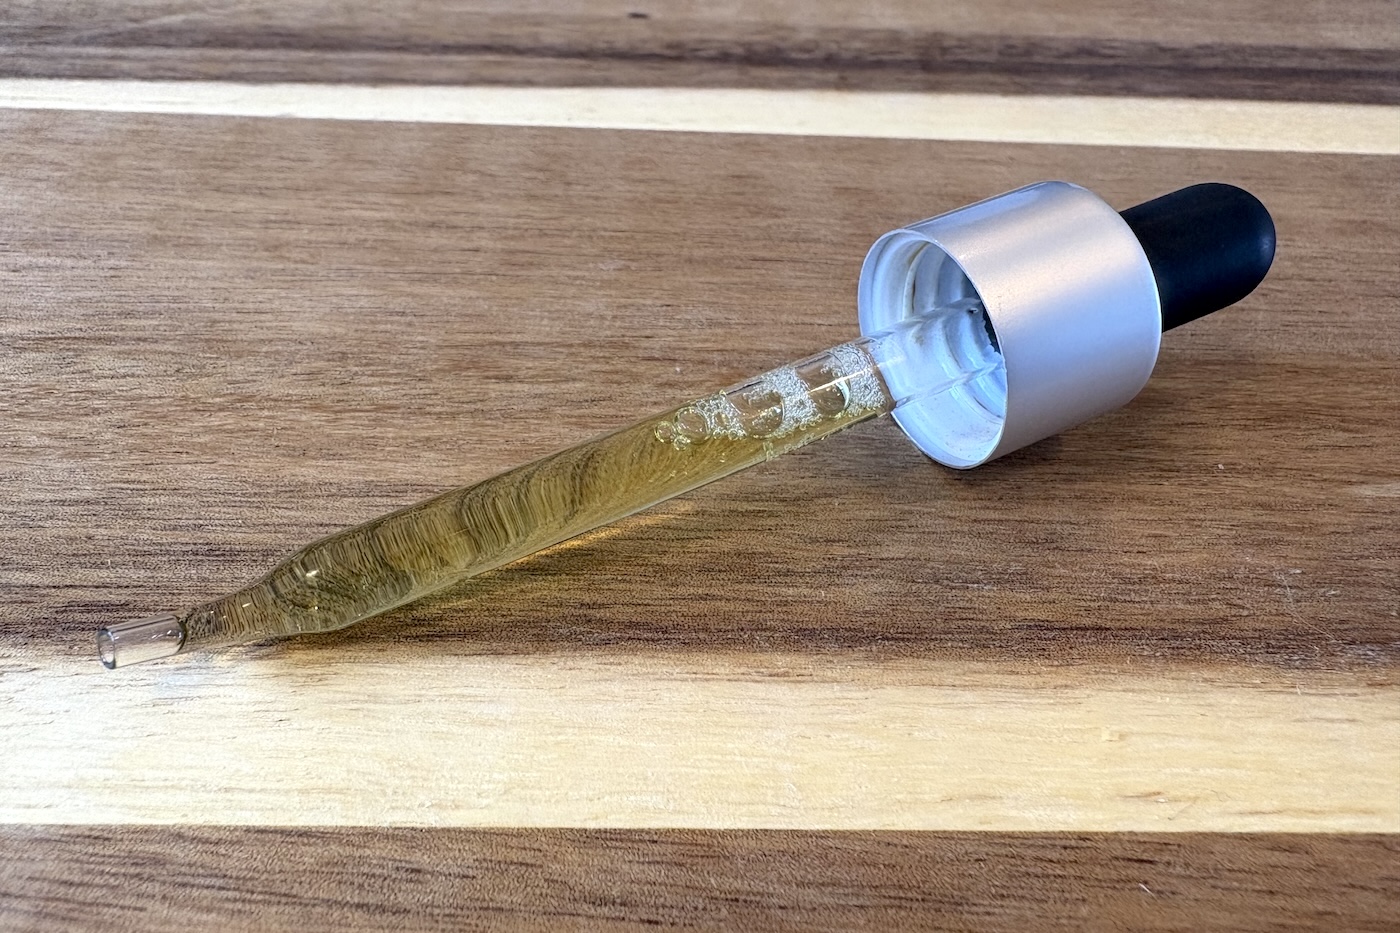
- Storage Containers – Proper storage containers are necessary for harvesting, curing, and storing your marijuana. Large black and yellow totes from the hardware store are a popular choice among growers. Paper bags or turkey bags are often used for curing inside plastic totes.
- Magnifying Device – A magnifying glass or jeweler’s loupe is used to inspect the trichomes and determine the best time to harvest. A 30x to 60x magnification loupe is ideal for seeing the trichomes. This tool helps you ensure that your cannabis plants are harvested at peak potency. Some growers use a microscope.
- Cleaning Supplies – Keeping your tools and workspace clean is vital to prevent contamination. Use isopropyl alcohol to sanitize your shears, scissors, and other equipment before and after use. A clean workspace reduces the risk of mold and other issues during the harvesting process.
- Hygrometer – A hygrometer can ensure your space is always in the optimal environment. These simple devices monitor your space’s relative humidity and temperature and are incredibly useful tools to keep in your drying and curing spaces.
Preparing for Harvest

Before you begin harvesting, proper preparation is essential. We’ve compiled a list of considerations that will maximize your harvest potential:
Set Up a Clean Workspace
A clean, organized workspace is crucial for a smooth harvesting process. Remove any clutter and ensure your area is dust and debris-free. This helps prevent contamination and makes the process more efficient.
Sanitize Equipment
Sanitizing your equipment is a vital step in the preparation process. Use isopropyl alcohol to clean your pruning shears, trimming scissors, and any other tools you will use. This prevents the introduction of pathogens that could spoil your harvest.
Create an Optimal Drying Environment
Creating an optimal drying environment is key to preserving the quality of your marijuana. Choose a dark, well-ventilated room with a temperature between 60-70°F (15-21°C) and a humidity level of 50-60%. Use portable air conditioners and dehumidifiers to achieve these environmental parameters.
Pre-Harvest Flushing
Pre-harvest flushing involves watering your plants with plain water for a few days up to one week before harvest, essentially depriving them of the nutrients they have been getting. This helps remove excess nitrogen from the soil, resulting in a cleaner, better-tasting final product. The length and severity of the flush varies depending on the growing style. Most hydroponic growers flush their medium before harvest, while soil growers may not.
Step-by-Step Guide to Harvesting Marijuana Plants

For first-time growers, understanding each step of the harvest process and its importance can be overwhelming. This step-by-step guide aims to simplify this process, providing clear and concise instructions to help you successfully harvest your marijuana plants.
- Inspecting the Plants – Begin by inspecting your plants closely. Look for signs buds are ready for harvest, such as the appearance of the trichomes and the color of the pistils. As mentioned earlier, milky white trichomes with some turning amber indicate the plants are ready for harvesting. Other signs that your plants are ready to harvest are the color of leaves and pistils on the plant. Pistils start bright white or green and darken to amber, orange, brown, or purple. Leaves may change color from green to red, orange, brown, or purple, and some may begin to turn yellow. Like a tree changing colors in the fall, your marijuana plants will also change color, especially if the nighttime temperatures are cold.
- Cutting Down the Plants – Depending on your drying method, you may cut down the entire plant at the base or cut branches off from the top. If you plan on freezing some of your small buds to extract, this method is better. If you have very large plants or a lot of them, this method is also more efficient on space.
- Removing Fan Leaves – You can remove fan leaves before or after cutting down your plant. Once the plants or branches are cut down, start by removing the large fan leaves. These leaves do not contain much resin and can be discarded or used for composting. Removing them now makes the trimming process easier. You can use scissors to cut them off, or using gloved hands, you can apply pressure at the base of the petiole where the leaf meets the stem, and the leaves will easily snap off.
- Wet Trimming vs. Dry Trimming – Decide whether you want to trim your buds immediately (wet trim) or after they have dried (dry trim); this is a matter of personal preference.
- Wet Trim: This involves trimming the buds while they are still wet. It’s easier to handle the leaves and can speed up the drying process. However, it can be stickier and messier.
- Dry Trim: This method involves trimming the buds after they have dried. It’s less messy and can result in a closer trim. It also allows you to keep the dried sugar leaves for processing into edibles, salves, tinctures, etc.
- Hanging and Drying the Plants – Hang the cut branches upside down on your drying racks. The drying process typically takes 7-10 days, depending on the environmental conditions. The warmer and dryer the room is, the faster the weed dries. Some growers flash dry their cannabis (70-90F for 3-5 days) at the risk of losing some of the more volatile terpenes while reducing the risk of mold.
- Bucking – If you dry your plant whole, you will need to remove the buds, known as bucking, and place them into a breathable container, such as a turkey bag or paper bag, or directly into a storage container. Alternatively, if you dry your weed on small branches, place the entire branch into a tote for the curing process,
- Curing the Buds – After drying, it’s time to cure your buds. There are various curing methods, and they are dependent on the quantity of yield and relative humidity of the environment. The curing process is the accumulation and release of moisture until it gets to around 10-12% moisture content.
Drying and Curing: Key to Quality
Proper drying and curing are vital for preserving the quality and potency of your marijuana. When this process is done improperly, your flower can end up smelling and tasting like hay, and it can smoke harshly or mold. Check out our article on drying and curing, and follow these steps to optimize your harvest.
Drying Tips
- Monitor Humidity & Temperature: Use a Wi-Fi or Bluetooth hygrometer to keep track of humidity and temperature levels in your drying room without entering the room.
- Check for Mold: Regularly inspect your buds for signs of mold. Remove any affected areas immediately to prevent it from spreading.
Curing Tips
- Burp the Storage Containers: During the first week of curing, open the containers daily for about 15 minutes to release excess moisture. This process helps prevent mold and ensures even curing.
- Store in a Cool Dark Place: Light and heat can degrade cannabinoids and terpenes. Keep your containers in a cool, dark place to preserve the quality of your buds.
- Use Curing Bags: Consider using bags made specifically for curing to maintain an optimal environment.
Common Mistakes to Avoid When Harvesting Marijuana
Avoid these common mistakes to ensure a successful harvest:
Harvesting Too Early or Too Late
As discussed earlier, timing is crucial. Harvesting weed too early can result in lower potency and yield, while harvesting too late can lead to degraded THC and a more sedative effect. Always monitor the trichomes closely to determine the best time for harvest.
Improper Drying Conditions
Drying your buds in an environment that is too humid or too dry can lead to mold or brittle buds. Ensure you maintain the optimal conditions mentioned earlier and use a hygrometer to monitor the humidity levels. Don’t use a fan in your drying room. This will spread dust and particulate and can lead to uneven drying.
Skipping the Curing Process
Curing is essential for enhancing the flavor and potency of your marijuana. Skipping this step can result in a harsh, less enjoyable product. Take the time to cure your buds properly to maximize their quality.
Post-Harvest Care and Storage
Properly storing your harvested marijuana is key to maintaining its quality and potency. After drying and curing, place your buds in airtight glass jars. Mason jars work great for this. These jars protect your buds from air and moisture, which can degrade the quality over time.
Keep the jars in a cool, dark place to prevent light and heat from breaking down the cannabinoids and terpenes. Maintaining the right humidity level inside the jars is also crucial. You can use humidity packs to keep the environment stable, ideally between 55-65% humidity. Some growers love humidity packs, while others claim they absorb the smell and flavor. Use them at your discretion.
For long-term storage, stick with glass jars or specially designed-cannabis storage containers. Always check your stored buds regularly to ensure they remain fresh and free from mold.
Advanced Tips for Improving Your Harvest
Once you’ve mastered the basics, there are several advanced techniques you can use to further improve your harvest. From trimming, drying, and grading your flower check out these tips to improve your quality of bud.
Trimming your buds can be more than just removing the leaves. Advanced techniques like removing all “crow’s feet” from the buds can enhance their appearance and increase their market value. “Crow’s feet” are the dried petioles or stems of the fan leaves. Using precision scissors, trim the buds neatly, removing excess leaves and dried stems or “crow’s feet” but don’t try to shape the bud.
Optimizing Drying Times
Drying times can significantly impact the final product. While a typical drying period is 7-10 days, some growers shorten it to reduce mold. Get to know your environment and how weed dries in your space, and customize your dry time to fit your climate.
Quality Control
Implementing a quality control process can help you consistently produce top-quality marijuana. While processing your cannabis, grade it by size and density. Keep the “A” buds for top-shelf flowers, and throw the small airy buds in with your trim to turn them into edibles, salves, or tinctures.
Photos courtesy of Kandid Kush


