

Beginners Guide to Growing Marijuana Outdoors
If you’re considering growing weed outdoors, our comprehensive guide provides easy, detailed step-by-step instructions. It covers everything from selecting the right location to soil preparation, watering, pest control, harvesting and curing. However, before you get started, it’s important to understand the laws and regulations related to marijuana cultivation in your area so you can be sure to be fully compliant.
Location matters
To get the best results when growing weed outdoors, choose a south-facing location that receives at least six to eight hours of direct sunlight daily. Cannabis plants grown under the sun tend to yield a wider diversity of terpenes and a higher concentration of sesquiterpenes than indoor plants. Therefore, it’s important to plant your cannabis in an area with abundant sunlight and to be mindful of any microclimates that may affect your growing conditions, such as wind patterns and shade from surrounding structures. You want those plants to reach their full potential!
Ideally you should make sure that the temperature falls within the range of 60°F to 80°F (15°C to 27°C) to avoid stressing the plants and hindering their growth, but this is not always possible so try your best and remember cannabis is a very resilient plant. Additionally, it is equally important to have access to a dependable water source for consistent watering. Consider the frost dates in your area to ensure you complete your harvest cycle before the first frost. In California, for example, most outdoor grows are typically completed by the end of October.
While pre-made potting mixes are designed for growing, natural soil requires careful consideration of its composition. There are four main types of soil: sandy, silty, loamy, and clay soil. However, most soils consist of a combination of these soil types in varying ratios. When learning how to plant weed outside, it’s essential to understand the characteristics of your soil to ensure that your plants receive the proper nutrients and grow to their full potential.
- Sandy soil has good drainage but poor water retention, so it needs frequent watering.
- Silty soil is rich in minerals and organic particles and has good water retention, making it a fertile soil type.
- Clay soil is heavy, compact, and not easy to work with, but it is rich in nutrients and minerals and retains water well.
- Loamy soil is a mixture of sand, silt, and clay with added organic compounds, making it an excellent soil type for growing cannabis.
Cannabis plants thrive in slightly acidic to neutral soil, with a pH range between 6 and 7. Maintaining the pH level in this range ensures the ideal growing environment for your plants, allowing them to absorb nutrients effectively. Consider conducting a soil test to determine the pH, contaminants, and necessary amendments. Alternatively, you can dig a large hole and replace the soil, giving your plants a healthy foundation for growth development.
For optimal growth of your marijuana plants, it’s important to use soil rich in nutrients. Adding organic matter is an excellent way to improve the quality of your soil, while compost is a great option for providing essential nutrients. In addition, it’s important to have well-draining soil to prevent waterlogging and root rot, which can harm your plants.
Mixing your soil with 30% perlite & Coco coir to 70% soil ratio can help achieve the best results. This mixture will provide essential nutrients and improve drainage and aeration, allowing roots to breathe and grow more efficiently.
Pots vs Ground
When it comes to growing outdoor cannabis, both pots and planting in the ground can be viable options. For a regular-sized plant, it’s recommended to use a 10-20 gallon (38-76 L) container. Consider using 50-gallon (190 L) pots or larger for bigger yields. These larger containers provide more room for root growth and can lead to a healthier plant with higher yields. Let’s compare the two approaches to help you choose the best option.
- Potted plants offer portability and greater control over soil composition, but limited root space can affect size and yield potential. Potted plants may require more water and can absorb and retain heat, leading to overheated roots in hot climates.
- Growing cannabis directly in the ground has advantages such as unlimited root space and access to natural microorganisms. However, less control over soil composition and increased exposure to pests and weeds can be drawbacks.
Some growers even use a combination of both methods. Starting plants in pots allows for more control during the initial growth stages, and transplanting them into the ground once they reach a specific size can benefit both methods. Choosing between pots and planting in the ground depends on your goals, resources, and environmental conditions.
The right genetics
Many factors can make a cannabis strain more suitable for outdoor cultivation compared to a greenhouse or growing weed indoors. Outdoor growers typically have a limited growing season, so strains with shorter flowering times are preferred. The best strains possess adaptability, robust resistance to pests and diseases, and the ability to endure varying environmental conditions, including temperature and humidity fluctuations. Check out six easy-to-grow strains for beginner growers!
1. Blueberry Muffin
Blueberry Muffin is an indica-dominant hybrid with frosty colas and beautiful purple hues. This delightful strain results from the cross between Razzleberry and Purple Panty Dropper, boasting a high THC content of up to 28%. It thrives in a sunny Mediterranean climate and has a wide plant structure perfect for outdoor cultivation.
2. Humboldt Dream
Humboldt Dream is a Sativa-dominant hybrid created by crossing Purple Panty Dropper with Blue Dream. With a potent THC content of around 27%, this strain is sure to deliver a powerful high. It is an ideal strain for beginners looking to grow outdoors, as it requires low maintenance and can be harvested between Oct. 1st and 10th.
3. Dream Queen
Dream Queen is a remarkable sativa-dominant hybrid that crosses Skunk #1, Mazar Star, and Green Crack. With a THC level of 23%, this strain has a sweet, fruity aroma with a hint of Skunk. Dream Queen plants are resilient, robust, and known for their ease of cultivation, vigorous growth, short flowering time, and impressive yield.
4. Hella Jelly
Hella Jelly boasts incredibly potent THC levels of up to 30% and has a delightful fruity aroma of mango, strawberry, grapes, and cherries with a subtle hint of caramel. This high-THC strain is highly resistant strain to mold, has a sturdy apical main stem, and is easy to plant outdoors. Whether you are a beginner or a cannabis enthusiast, Hella Jelly won’t disappoint.
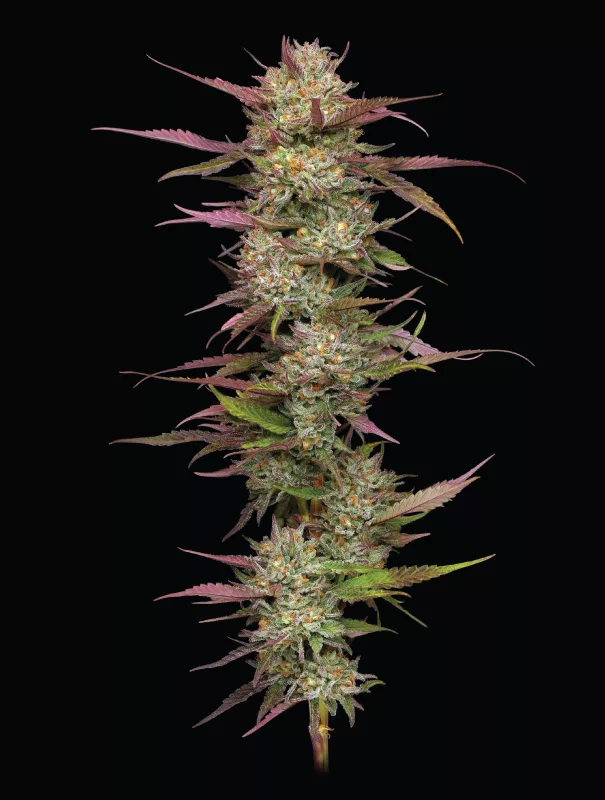
5. California Octane
California Octane Feminized is a resilient cultivar with an Indica-dominant feminized variety and a unique terpene profile inherited from Dream Queen, I-369, and Papaya. With a THC level of up to 32%, this strain produces super-stacked, pyramid-shaped buds covered in sticky resin, emitting an intense smell of guava, gelato, and Diesel fuel. It’s an excellent option for beginner outdoor growers.
KISS method vs outdoor hydroponics
The Keep It Simple, Stoner (KISS) method and outdoor hydroponics represent two different approaches to growing cannabis outdoors, each with its advantages and disadvantages.
The KISS Method is a simple, beginner-friendly growing process that is easy to understand and maintain. It is also budget-friendly and relies on natural soil, simplifying nutrient management. This method is accessible to those without advanced technical knowledge, making it an excellent choice for beginners.
One of the disadvantages of this method is that it offers limited control over environmental factors, which may result in slower growth and lower yields than advanced methods. Additionally, this method may not be adaptable to varying environmental conditions or specific plant requirements and heavily depends on natural ecological conditions.
Outdoor hydroponics is a method of growing outdoor cannabis using hydroponic systems outdoors, which involves cultivating plants in a nutrient-rich water solution without soil. With this method, growers can achieve a perfect balance of nutrients and water, resulting in faster and healthier plant growth during the summer months when sunlight is abundant. This method is for experts only and not recommended when local soils are fit for cultivation.
Outdoor hydroponics has many advantages. It provides direct nutrient delivery, faster growth, higher yields, and better control over nutrient levels. It also eliminates soil-related problems such as pests and diseases.
Disadvantages include higher setup and maintenance costs, the need for technical expertise, and constant monitoring of nutrient and pH levels. It also relies on equipment, which may be prone to malfunctions, making it a challenging option for beginners.
Deciding whether to opt for a simple growing method or outdoor hydroponics depends on your level of experience and available resources. If you’re a beginner grower, we suggest starting with a more straightforward method until you feel comfortable with the growing cycle. Then, you can move on to more advanced techniques like outdoor hydroponics.
Unwanted pests in your garden?
Growing marijuana outdoors can present some challenges that indoor growers don’t have to worry about, such as exposure to a variety of unwanted pests that can cause significant damage. To protect your plants from insects and other pests, it’s essential to implement pest control measures.
Inspecting your plants regularly for signs of disease or infestations is essential. Early detection can make a significant difference in treating and preventing the spread of pests and diseases. If you live in an area with young mammals, protecting your plants with a wire fence is an excellent idea to keep them from being damaged or eaten. A sturdy fence can help keep out rabbits, squirrels, and other small mammals that may be attracted to your plants.
Remember an ounce of prevention is worth a pound of cure.
Let’s talk about nutrients
To ensure healthy growth and robust yields when growing ganja outdoors, it helps to understand your soil composition and to analyze its nutrient levels and pH balance using a soil testing device. Cannabis plants need a variety of nutrients, including N, P, K, Ca, Mg, and S, with each nutrient crucial to their overall development. Balanced fertilizers that provide the right mix of essential nutrients in proper proportions are vital for ensuring the healthy growth of your plants.
When choosing nutrients for cannabis plants, organic fertilizers promote long-term soil health by slowly releasing nutrients, fostering microbial activity and improving soil structure. You can also consider adding compost to enhance soil nutrient availability and water retention. At the same time, natural amendments like bone meal, kelp meal, or fish emulsion can further boost your soil’s nutrient content.
Trellising and support
It’s important to support your plants during the flowering period to prevent branches from breaking. You can use several techniques, including stakes, cages, and trellising. Here are four of the best options you should consider:
- Bamboo is renewable, strong, lightweight, and an excellent alternative to traditional trellising materials for supporting plants.
- Jute netting is a sustainable and biodegradable option made from natural fibers. It’s strong enough to support heavy plants and can be easily cut to size.
- Plastic netting is a budget-friendly option that’s widely available. It’s easy to work with and can be reused for multiple outdoor growing seasons.
- T-posts are durable and reusable metal trellising options for heavy-duty support, but they can be costly and not the most sustainable method.
Ensuring your plants’ proper support is essential for their overall health and productivity. Regardless of the trellising method, your plants can grow to their full potential by providing the appropriate support, resulting in high-quality yields that exceed your expectations.
Six basic steps for growing weed outdoors
Before we jump into our beginner’s guide on how to grow weed outside, it’s essential to have all the necessary equipment for the perfect outdoor grow setup. Here’s a checklist for all the equipment a beginner will need to take a cannabis seed through harvest outdoors.
- Humboldt Seed Company seeds
- Shovel
- Pruning shears/scissors
- pH meter
- Watering can/hose
- Nutrient supplements
- Trellis netting
- Stakes and ties
- pH-adjusted watering kit
- Gardening gloves
- Buckets/containers
- Sunscreen and hat
- Weather monitoring tools
1. Germination
It is recommended to start germinating seeds in the spring to avoid harsh, cold weather. Mother Nature can be unforgiving. First, place two plates with moist paper towels on them. On top of one of the paper towels, place the cannabis seeds an inch apart and cover them with the other plate. It is important to keep the plants in a warm and dark environment consistently. Check them daily and spray some water to keep the environment moist.
After the taproot emerges, create a small hole, place your cannabis seed with the taproot facing down into a small pot or plastic cup of grow medium, and wait until the marijuana seedling develops a sturdy structure and a few sets of leaves. When you’re ready to transplant them outdoors, choose an appropriate outdoor location, water your seedlings thoroughly, and dig appropriately sized, spaced holes. Fill the holes with soil, pressing it down firmly, and water them regularly.
Clones
If you have access to reputable healthy cannabis clones, you can save time and effort by bypassing the germination process and planting them directly into your grow medium. This can be an excellent option for experienced growers who want to streamline their growing process and maximize their yields. Gradually acclimatize them to outdoor conditions to prevent transplant shock. To maximize growth, select strains that are well-suited for your climate.
Growers tips
To help you avoid common mistakes during this crucial stage, our growers have some tips to share. Follow these guidelines and you’ll be able to germinate healthy seedlings in no time!
- B Avoid overwatering your plants, as the root system is still delicate.
- Extreme temperatures or excessive moisture could be why your plant fails to sprout. Optimal growth requires a temperature range of 70° F to 100° F.
- To avoid stunting growth, it’s essential to remember not to plant the seed too deep. Always create a one-half inch hole to ensure proper growth.
2. Vegetative stage
The duration of the vegetation stage outdoors relies on the amount of sunlight the plant receives. Typically, this stage lasts anywhere from four to eight weeks but can vary depending on the strain and the amount of sunlight available. In Northern California, cannabis plants begin to show signs of flowering in the first or second week of August, as the days get shorter and the nights get longer. This triggers a hormonal response, causing it to transition to flowering.
- During the first week, cannabis plants sprout from the soil as seedlings with two small cotyledon leaves. The plant develops its first set of true leaves by the second week, and initial root development occurs.
- Entering its third week, the marijuana plant experiences a noticeable surge in development, becoming more bushy and developing its characteristic shape with an increase in both nodes and leaves.
- In the fourth week, the plant undergoes a significant growth spurt and becomes sturdier, with increased foliage and branching. This leads to more space between the nodes, making it a crucial time for growers to focus on training and pruning to ensure optimal growth.
- By week five, the plant experiences a rapid vegetative growth period, with branches becoming more robust and the overall size of the plant significantly increasing. This creates a lush canopy, providing ample space for buds to develop and thrive.
- During weeks six and seven, the canopy develops more and lateral branches extend further, giving the plants a bushier structure. Consider implementing training techniques like Low-Stress Training (LST) or topping to control height and shape.
- As the plants grow larger during weeks eight and beyond, their nutrient demands increase. Ensure they receive a balanced nutrient regimen, adjusting as needed based on signs of nutrient deficiencies or excesses. Keep an eye on the pH levels of the soil or growing medium.
Growers tips
The vegetation stage is crucial for beginner growers outdoors for several reasons, and while it offers opportunities for successful cultivation, particular challenges may arise.
- Short plants may be caused by incorrect Ph levels, which can cause a nutrient lockout.
- Nutrient management can be challenging for beginners. Over- or under-fertilizing during vegetation can result in nutrient imbalances that affect plant health.
- Pests can also be a problem, but an Integrated Pest Management (IPM) system that includes predatory insects can help control the issue.
Pruning
Pruning is an important aspect that directly impacts the growth and yield of outdoor cannabis plants. By compensating for the plant’s energy levels, it helps achieve the desired yields by promoting optimal growth. We have put together a step-by-step guide to then pruning process to assist you during the vegetation period.
- First, make sure to use sanitized pruning shears or scissors
- Cut stems at a 45-degree angle to prevent disease caused by moisture buildup.
- Prune in early to mid-vegetation when plants have multiple sets of leaves.
- Strategically remove lower branches in late vegetation to improve airflow.
- Remove any yellowing or dead leaves in the lower canopy.
- Dispose of trimmings, water the plant well, and provide nutrients for recovery.
3. Flowering stage
During the outdoor flowering phase, cannabis plants direct all their energy towards producing dense buds. As a result, they can grow to towering heights, sometimes requiring a ladder to reach the top colas. This is particularly true for sun-grown cannabis in California, where plants can reach exceptional heights due to the long hours of sunlight.
In the first three weeks of the transition phase, outdoor cannabis plants typically experience significant growth, commonly known as “the stretch,” as they shift from vegetative to flowering. It’s crucial to provide a balanced nutrient supplement with adequate nitrogen (N) to support this rapid growth. However, gradually reducing nitrogen levels is vital as the flowering phase progresses to prevent nutrient burn and promote healthy dense bud development.
During the fourth and fifth weeks of the flowering stage, buds experience rapid growth, and higher levels of phosphorus (P) and potassium (K), commonly known as PK boosters, are essential for their development. As the buds grow, their size and density increase while resin production intensifies, increasing the concentration of valuable cannabinoids and terpenes.
As your cannabis plants reach week six, the dense colas develop a robust aroma, while the trichomes undergo further changes. During the seventh week of the finishing stage, your cannabis plants experience a shift in nutrient requirements as they approach harvest. You’ll typically reach peak trichome maturity during the eighth and final week of the finishing stage when they change from clear to cloudy and eventually become amber.
Growers tips
The flowering stage can be a fascinating time for beginner growers. Here are some valuable tips that can help you achieve optimal bud development.
- It’s recommended to use trellis netting to keep plants manageable. This helps support the branches and prevents them from falling over.
- Use stakes to stop branches from breaking under the weight of the buds.
- After initial flowering stretch, maintain an even canopy and eliminate unnecessary growth through further pruning.
4. Flushing
Flushing your cannabis plants is a straightforward process – simply replace your regular feeding with a thorough flush. Flushing your plants with pure water with a pH of 6.0 to 6.8 for at least 14 days before harvest is recommended. This process helps to eliminate any residual chemicals or contaminants retained in the medium, which could potentially affect the quality, taste, aroma, and potency of your cannabis.
Growers tips
This stage may seem straightforward, but there are always expert tips to help you take your skills to the next level!
- If you notice your plant’s leaves turning yellow, there’s no need to worry. This is a good sign that the flushing process is working and effectively removing excess nutrients.
- It is recommended to use three to four times the amount of water as the volume of your container.
- For a successful flushing process, it’s essential to measure the EC or TDS levels of the runoff water. While the initial levels may be high, they should gradually decrease as you continue the flushing process.
5. Harvesting
Determining the best time to harvest marijuana plants is a crucial step in achieving the desired effects. The color of the trichomes is a tell-tale sign of when to harvest. To check the trichomes, you can use a jeweller’s loupe to inspect the buds.
- Clear trichomes suggest an early harvest.
- Abundant amber trichomes indicate a late one.
For the best results, it is recommended to wait until around 70% of trichomes are primarily cloudy, with approximately 30% amber before harvesting. Moreover, for the highest terpene content, harvesting your plants in the morning is recommended.
When it comes to harvesting, growers use different techniques. Some prefer to cut down the entire plant with one clean cut at the base of the stem, while others like to harvest the main cola first, allowing the lower branches to mature further. It’s best to make clean cuts at a 45-degree angle for smaller branches, leaving a small portion of the stem attached to the bud. This helps to preserve the overall quality of the harvested buds.
Growers tips
Harvesting is often the most exciting part of the outdoor grow cycle for many growers. After all the hard work, seeing the fruits of their labor can be incredibly satisfying. Here are some helpful tips to make this process as smooth and hassle-free as possible.
- Use gloves and minimize handling of the buds to prevent damage to the delicate trichomes.
- Remove large fan leaves before harvesting the buds. This will help the buds dry more evenly and prevent mold or mildew from forming during drying.
- Prepare your drying area before harvesting to stay organized and efficient. Ensure the area is clean, dry, and well-ventilated, with a consistent temperature and humidity level.
6. Drying and curing
Drying and curing cannabis is just as important as the growing process itself. To dry, hang branches upside down in a cool, dark area with ventilation. Plants generally take 10-14 days to dry when in ideal conditions. Trim excess material and place buds in airtight glass jars with 58-62% humidity levels. Cure for several weeks, opening the jars occasionally for fresh air. Store in a cool, dark place, away from light and moisture, to maintain freshness. Properly dried and cured buds can last for months without losing their potency or flavor. For the smoothest smoke finished cured buds should contain 10-12% moisture.
Growers tips
Curing cannabis requires patience and attention to detail to achieve the desired flavor, aroma, and potency. To help you get started, here are some valuable tips:
- To release built-up moisture and prevent mold growth, “burp” the jars by opening them for a few minutes each day during the first week of curing.
- Maintain the freshness and prevent degradation of your cured buds by storing them in a dark, airtight container in a cool place.
- Ensure an optimal environment inside the curing jars by aiming for a relative humidity (RH) level of 55-65% and temperature between 60°-70° F.
- Curing cannabis requires patience, as it takes time to achieve optimal results. Typically, it takes at least two weeks but can extend to several months.
After a successful grow cycle, it’s time to enjoy your freshly cured buds, and we’re confident you’ll never forget your first outdoor harvest.
FAQs
Check out these commonly asked questions and answers to help you start growing ganja outside!
Does weed grow in the wild?
Yes, weed has grown in the wild for many thousands of years. Like various wild plants, It can grow wild in regions with favorable climates and growing conditions. The term “ditch weed” generally refers to cannabis plants that grow in the wild and often thrive in ditches or alongside roads across parts of Asia, Africa, the Middle East, and Central America.
Can you grow weed outside anywhere?
Growing marijuana outside is not allowed everywhere and depends on local laws, as well as the climate and environmental conditions in that particular area.
How much does it cost to grow a weed plant outside?
The initial investment to start an outdoor weed grow would be around $200 for equipment, making it a fairly cost-effective option for those just starting out.
Is it hard to grow marijuana outdoors?
Growing weed outdoors can be straightforward, but it depends on multiple factors, such as climate, soil quality, local regulations, and the strain you select, which can affect the outcome of your efforts.


